forscoreapp

About the author

Annotation

Uncategorized

In most cases, tapping the currently selected tool presents additional options

On larger devices, resize or reposition the stamps or shapes panels by dragging the handles near the edges of the panel. Double-tap the top handle to reset the panel’s position and size.

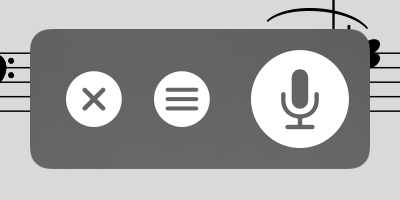
Add notes to your score by selecting “Annotate” from the tools menu or by tapping and holding your finger on the page for a few moments. When you do, a new set of controls will appear on the screen:

The set of three lines in each corner allow you to drag the control bar up and down so you can annotate anywhere on the page. Tap the × or check mark button to discard or save your changes, or tap the arrow buttons to save and continue annotating on a nearby page.

On the second row of controls you’ll see stamps, shapes, and a scrolling view of your drawing presets. Tap a preset to use it, and tap again to edit, move, or delete it. Use the last item in this area (+) to add new presets.

In the next section over you’ll find additional tools like a ruler, a selection tool, a typing tool, an eraser so you can remove certain annotations and delete links or buttons, and a clear button if you want to start from scratch.

Use the undo and redo buttons in the next section to quickly correct mistakes, and use the rightmost button to access and work with annotation layers (discussed later in this section).

Note: when forScore is using a smaller layout, such as on an iPhone or using Split View on an iPad, the annotation toolbar cannot be moved and will not display the redo and clear buttons—in this case, tap and hold the undo and eraser icons to use these functions.

Stamps & Shapes

Some musical symbols cannot be typed into a text box or drawn precisely, but with the “Stamps” and “Shapes” tools you can place these kinds of annotations on the page quickly and easily. Tap to select either tool, then tap again to see all of the available options for each. Select one and drag your finger around on the page to see how they work. At the bottom of the panel, use the size slider to adjust a stamp’s size or a shape’s line width.

Tip: Use tinting to place colored symbols on a page: set a stamp color and enable tinting (you can disable it at any time without losing your color choice), then use the stamp tool like you normally would. You can also change the color of individual shapes—tap the color well or circled arrow button next to a shape, depending on your OS version. Note that tinting does not affect your existing annotations.

You can add your own stamps by pressing the “…” button or edit an existing stamp by selecting it, tapping again to show the contextual menu, and choosing “Edit.” This opens the stamp editor where you can draw or edit your design.

You can also create stamps from one or more images from your device’s photo library, the Files app (and any configured cloud storage services), or from forScore’s documents directory if you’ve added any images using File Sharing. First, find or create a PNG image (for best results it should be 144×144 pixels), then tap the “…” button in the top left-hand corner of the panel and choose the appropriate source and select your image(s). On iPad or Mac, you can drag and drop an image from virtually any app directly into the stamp creator and edit it as needed before saving.

Tip: The “Browse Images” interface allows you to delete images you no longer need: swipe from left to right over the item in the list and tap the delete action to confirm.

If you use particular stamps more often than others, you can rearrange them as needed. Tap and hold a stamp for a moment, then drag it around on the screen, and the others will move out of the way. You can also delete a stamp by selecting it and then tapping the trash can button at the bottom of the panel.


Tap a drawing preset once to select it, then tap again to edit it

Tap within the selected area to show or hide the action popup

Tap to choose the selection tool, tap again to change its selection style

Drawing Presets

Drawing presets allow you to create an unlimited number of different styles perfectly tailored to your needs. Tap the + button to create a new preset, or edit any existing preset by tapping it once to select it and then tapping again to show the editor. You can adjust the hue, saturation, transparency, brightness, size, and overlay mode for each preset. Use the buttons in the toolbar along the bottom of the editor to delete or duplicate your preset. To reorder your presets, close the editor and tap and hold to drag a preset left or right.

Ruler

When you need to draw straight lines or precisely align your stamps and shapes, the ruler tool is ready to help. Just tap the ruler icon to show or hide it. Reposition it by dragging it around on the page, or rotate it by placing two fingers within the ruler and spinning them clockwise or counter-clockwise: as you do, a dot will appear showing you the current angle. When you get close to a right or diagonal angle, the dot will turn blue and the ruler will snap to that value.

Place your finger near either edge of the ruler to draw a straight line or to position your stamp or shape along it. If you start drawing further away from the ruler and draw into it, your markings will stop at the edge.

Selection Tool

The selection tool allows you to edit a specific area of drawn annotations after they’ve been made (including stamps and shapes). Draw around the annotations you want to edit and you’ll see several new actions appear in a dark popup near your selection. The move tool, active by default, lets you reposition your annotations: drag your selection around on the page, then tap outside of it to commit your changes or tap within the selected area to continue editing it.

You can also choose from one of the other five actions: Duplicate, Copy, Cut, Adjust, and Clear. The duplicate action creates a copy of your drawings that you can then drag to reposition, Clear erases the selected area, and Cut combines the Copy and Clear actions.

Copy saves the currently selected drawings and lets you paste them on another page, even in another file. With the selection tool active, tap to place the copied drawings onto the page (drag to reposition if needed or tap the arrow button to use the copy’s original position).

The Adjust action lets you re-color your annotations by changing their hue, saturation, brightness, and opacity.

Text Annotations

Text annotations can be used to display text directly on a page at all times. With the text tool selected, tap the page to create a new text box. Drag the white circle on the left side of it to move it, and drag the one on the right to change its width (forScore automatically adjusts its height to show all of its text).

When you tap inside of a text box to edit it, you’ll also be able to adjust its style (and set defaults for new text boxes), assign it to another layer, or delete it. On iOS and iPadOS, these actions are available in the toolbar that appears at the top of the virtual keyboard, if shown, or along the bottom of the screen if not (the system hides the virtual keyboard when a physical keyboard or certain page turning devices are connected). On macOS, tap the ellipsis button to the right of the active text box to access these options. When you’re done editing, tap the page outside of the text area to dismiss the keyboard.

Layers

Use layers to separate your annotations, allowing you to work with one set of markings without affecting any other. The Layers panel lets you view and manage layers, pick the active layer, and reorder, hide, duplicate, clear, or combine them. Score layers are available on every page of the current score and can be hidden or shown for all pages at once.

You can also copy the entire contents of a layer and paste them atop or replace the contents of another layer, even on a different page or score. In the layers panel, tap and hold a layer to access these and other actions using its contextual menu.

forScore Pro subscribers have access to an additional “PDF” layer that allows them to copy and paste page contents and make structural changes to their documents. Learn more about this feature in the forScore Pro section of this guide.


Logitech’s Crayon stylus is based on Apple Pencil technology and works similarly; the instructions in this guide apply equally to each accessory except where noted

Apple Pencil (iPad only)

When you’re using Apple Pencil, forScore gives you additional options that allow you to work more naturally. “Automatically enter annotation mode” activates the drawing tools the moment Apple Pencil touches the screen, and “automatically exit annotation mode” saves your changes after a brief period of inactivity. We refer to these settings collectively as “instant annotation.”

Although iOS and Apple Pencil work together to avoid unintentional input, no system is perfect. If you don’t plan to annotate by drawing with your fingers, enabling “prevent finger drawing” may help. You’ll still be able to use your fingers to do things like change tools or zoom in, but only Apple Pencil will draw. If Apple Pencil hasn’t been used for a while, or if you tap the hand icon in the annotation toolbar, finger drawing will be re-enabled.

Newer Apple Pencil models support squeeze/tap gestures which can be used to switch tools, show the current tool’s detail view, and more (configurable in the Settings app). If you prefer to be able to switch tools even when annotation mode is inactive, change the “switch tools” option in the Apple Pencil section of forScore’s settings panel. Otherwise, this gesture can optionally be configured for use outside of annotation mode using the instructions found in the Page Turners & Shortcuts section of this guide.

If Apple’s Scribble feature is enabled on your device, you can use Apple Pencil to hand-write words directly into a text annotation and iPadOS will transform them into text automatically.

Newer iPads support hover detection, allowing forScore to show a drawing preview before your pencil touches the screen. This can be customized, along with additional options available to forScore Pro subscribers (see the forScore Pro section for more information).

Sidebar

If the sidebar is visible and presented in tiled mode, that space is repurposed when annotation mode is activated. The Layers list is shown here by default, but can be replaced by the Stamps or Shapes panels by tapping either of these tools once to select them, if needed, then tapping them a second time. Note that you can continue to use other tools or presets while these detail views are embedded in the sidebar.

Note: forScore’s split view layout and the sidebar are always available on macOS, and can be optionally enabled using the Display Options interface on supported iPads (devices running iPadOS 16 that support Apple’s Stage Manager feature). The sidebar is not available on other devices.

Settings

forScore also includes several settings that give you more control over how annotation mode saves your last-used tool or preset. By default, the last tool you used remains selected the next time you enter annotation mode. In forScore’s settings panel, the “Annotation Tools” section allows you to change this: either choose which tools can be saved between annotation sessions and which should not, or pick a default drawing preset that will be active each time you start annotating.

As you draw, lines can become bolder to capture your natural emphasis (this is based on pressure and tilt with Apple Pencil, tilt with Logitech Crayon, or drawing speed when you’re using your finger). Use additional options in the settings panel to control how pronounced this variable width effect is.

Settings

Uncategorized

General

  • Auto-lock: Disable this setting to prevent your device from sleeping automatically while forScore is open.
  • Search: Adjust which kinds of results are shown and in which order, how many recent items are listed, and more.
    • Show recent items: Choose how many recent items to show in the search panel before you’ve typed anything into the search field (enter 0 for none).
    • Search results: Check or uncheck specific result types and reorder them to prioritize those you want to see first.
    • Search PDF text for title: When creating a bookmark, as you type in the title field this feature can offer page number suggestions based on occurrences of that text within the PDF file (not available for image-based files).
  • Devices: Connect to certain types of accessories like the AirTurn PED or IKMultimedia BlueBoard.
  • MIDI: Toggle the ability to send and receive MIDI commands or use the piano keyboard as a synthesizer.
    • Send commands: Allow forScore to send signals you’ve added to specific scores each time you open them (see Metadata)
    • Receive shortcuts Allow forScore to interpret some incoming MIDI signals as score shortcuts (see the Metadata section) or action shortcuts (see Page Turners & Shortcuts)
    • Synthesizer: Allow forScore to play piano sounds in response to incoming note messages.
    • MIDI network setup: Connect to a nearby network MIDI session.
    • Bluetooth MIDI devices: Connect to nearby Bluetooth LE-enabled MIDI devices.
  • forScore Pro: Get more out of forScore with this optional, auto-renewing subscription.
    • Manage subscription: Learn more about, and sign up for, the forScore Pro service.
    • Pop-up menus: Enable or disable popup menus and manage your pinned tools.
    • Face gestures: If your device supports it, choose which face gesture mode to use and calibrate its sensitivity.

Navigation

  • Up next: See the next queued item’s title in the status bar when you reach the last page of the current item.
  • Gestures: Configure forScore’s taps, swipes, and shortcuts to better suit your needs.
  • Page turners & shortcuts: Use keyboard shortcuts, MIDI signals, page turner pedal presses, or an Apple Pencil 2 double tap gesture to trigger certain actions.
  • Page transitions: This setting affects the transition animation that is used when turning pages.
  • Flip between scores: Choose when to advance from the end of one score to the beginning of the next, like a book.
  • Landscape scrolling: When using landscape orientation, scroll up and down by half or a third of a page (11-inch iPad Pro only).
  • Two-up page advance: Choose whether to advance one or two pages at a time when using two-up mode.

Appearance

  • Show status bar: Controls whether the system status bar along the top of the screen is visible while using forScore.
  • Controls (or inline settings): Prevent the seek bar from hiding when the title bar is dismissed, show the tab bar when a single tab is open, and control how the title bar behaves (if your device supports resizable windowing).
  • Theme: Adjust the look and feel of forScore’s interface.
    • Colors: Change forScore’s primary interface colors or choose from a list of built-in themes.
    • Interface style: Choose to always use light mode, always us dark mode, or follow the system setting instead.
    • Icon weight: Choose a bolder or lighter style for most icons and buttons.
    • Page dimming: When using dark mode, forScore can dim your pages to reduce contrast in low light environments.

Metadata

  • Score menu includes bookmarks: Bookmarks typically appear in two places—the bookmarks menu itself, and alongside other files in the score menu. Disable this to hide bookmarks from the score menu.
  • Use external audio: When forScore launches, it checks to see if iOS’ shared audio system is currently in use. If so, this option will allow you to control playback of that track, temporarily overriding any linked tracks.
  • Sorting: Adjust how forScore sorts your composers, scores, and bookmarks.
    • Sort composers by first name: Alphabetizes by first word in the composer value instead of the last word.
    • Smart sorting: For checked items, sorting ignores common prefixes like “the,” “a,” or “an.”
  • PDF annotations: Choose which kinds of embedded PDF annotations should be visible (and interactive, if applicable).

Annotation

  • Exit two-up mode to annotate: If you’re using two-up mode, use this setting to control whether or not forScore should temporarily return to one-up mode and enlarge the current page while annotating.
  • Apple Pencil: Adjust how annotation works when using Apple Pencil or the similar Logitech Crayon.
    • Automatically enter annotation mode: Allows you to begin drawing at any time without entering annotation mode first.
    • Automatically exit annotation mode: Allows forScore to save your work and exit annotation mode after a brief period of inactivity (defaults to Never).
    • Prevent finger drawing: Restricts drawing to Apple Pencil in order to prevent accidental input.
    • Variable width: Choose whether to increase drawing width based on tilt and/or pressure, and optionally enable a more advanced method of curve drawing.
    • Switch tools: Apple Pencil 2’s double tap gesture can control which annotation tool is currently active, and by default only works while you’re in annotation mode. Enable this setting to allow the gesture to work at all times (if you do, this gesture will no longer be configurable within the Page Turners & Shortcuts panel).
  • Annotation tools: Control how forScore saves your last-used preset between annotation sessions.
    • Remember tool selection: Allow or prevent forScore from saving your last-used annotation tool.
    • Default tool: Choose a specific tool to always be selected when you enter annotation mode. If an item is selected in this section, the previous section has no effect.
    • Add period with double-space: iOS automatically adds a period when you type two spaces into a text field. Disable this setting to prevent that behavior while using forScore’s text annotation tool.
  • Variable width: Adjust how much forScore should emphasize your drawings based on speed or Pencil pressure and tilt.

System

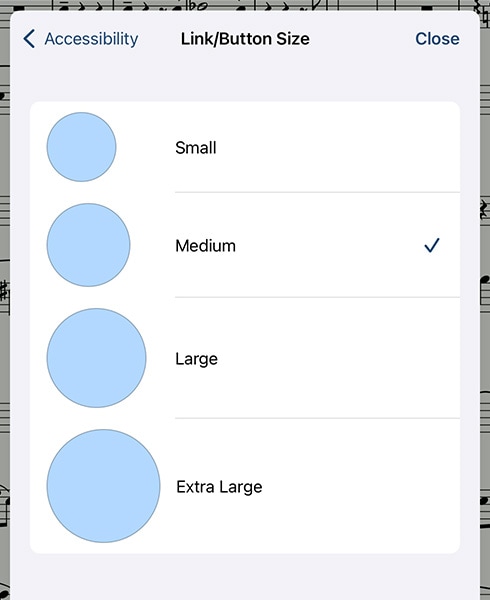
  • Accessibility: Enable or disable certain features, change the app’s color, adjust the size of links and buttons, or customize the metronome’s sounds.
  • App icon: Change forScore’s app icon.
  • In-app purchases: Access any downloadable content you’ve previously purchased through forScore’s storefront.
  • Advanced options: Access advanced/older settings and temporarily re-enable retired features that have limited support and may be removed in future updates.
  • Restrictions: Set a passcode and hide certain features.
  • Reset: Restore default app settings, stamps, or drawing presets, or scan your library and remove any unused data.

Backups

Uncategorized

Every app on your device has a standard set of folders that it uses to store information. This ‘Documents’ directory is used to store user content, like documents you add to (or create within) an app. Other data like app settings, which are designed to be changed through the app’s interface and not edited directly, are stored in a number of private app directories instead.

4SB Backups

In forScore’s Backups panel you can create a forScore Backup (4SB file) that packages all of forScore’s private information into a single document that is saved alongside the rest of your files in forScore’s Documents directory. Copy all of the files in this directory (including the 4SB file) to a safe location and you’ll be able to restore forScore back to its current state without affecting any other apps. As a safeguard, forScore creates an automatic 4SB backup when you launch the app. It keeps the most recent copy and a copy from the last calendar day you used it.

A backup file can not be used on its own. It only contains forScore’s information about your documents, not copies of your documents themselves. Backups are a good choice when copying all of your files to a computer using File Sharing.

4SB Archives

You can also use the Backups panel to create a forScore Archive which is similar to a backup (it also uses the 4SB file extension) but it includes a copy of every file in forScore’s Documents directory as well. This means that in order to create an archive you need to have significantly more free space available on your device, but it can be used to restore your library or migrate to a new device by copying the single archive file.

An archive file can be used on its own to recover or migrate your forScore library to a new device. They’re great for uploading your library to a cloud storage service for safe keeping.

forScore Backup Utility

Mac users running macOS 10.14 or later can use the forScore Backup Utility to archive their iOS device’s forScore library directly to their computer via a USB cable. This can be useful if you want to create a 4SB Archive but don’t have enough free space on your device. Visit forScore.co/backup-utility for more information.

Apple Backups

In most cases, whole-device backups to iCloud or iTunes (depending on your settings) are sufficient to get you back up and running if something happens to your device. The backup techniques described in the sections above are intended to provide an additional layer of security, not to replace this essential part of protecting your data.

Recently Deleted Files

When you delete a score or setlist using forScore’s delete functions, it is moved to the Recently Deleted section of the Backups panel. You can recover it for up to seven days or permanently erase it, if needed.

CSV Metadata Import/Export

Tap the scrolled page icon in the top left-hand corner of the Backups panel to import or export your forScore metadata using standard CSV (comma-separated value) text files. These files are exported using UTF-8 encoding by default, but this can be adjusted to UTF-16 if needed under Settings › Advanced options › CSV export.

Drag & Drop

Uncategorized

Drag and Drop gestures make working with forScore much faster and more intuitive. In most cases Drag and Drop provides a second way of doing things, so you’re free to use the original way if you prefer.

Basics

To use Drag and Drop on iOS or iPadOS, tap and hold certain items for a moment until they appear to lift off the screen, then drag your finger away from it slightly to begin the drag process. While holding the item with one finger, you’re free to use your other fingers to interact with forScore or any other app on your device. On macOS, drag and drop works immediately—just click and drag without pausing first. Since Macs don’t support multiple simultaneous pointer interactions, some drag and drop techniques described below may not be practical on macOS.

Note: Contextual Menus also use a long press gesture and change how Drag and Drop works in cases where both are available. Tap and hold an item to show its contextual menu and then drag the preview away to use Drag and Drop (there’s no need to lift your finger first, just use one continuous motion). If you prefer, you can disable either Drag and Drop or Contextual Menus in the Accessibility section of forScore’s settings panel.

In some cases, tapping additional similar items adds them to the drag session (like dragging a score in the Score menu, then tapping other scores to drag them at the same time). You can open and close menus and panels and your drag items will follow your finger as long as it’s touching the screen.

When you’ve dragged your finger over a valid drop zone, you may see some indication that lifting your finger here will perform some kind of action. The drop zone may react by moving or changing colors, or a green “+” badge may appear, for instance, letting you know that dropping the items in this spot will copy them in some way. Each interaction works a little differently, so try some of the following examples for yourself to see how they behave.

Rearranging Items

Many of forScore’s views list items that can be rearranged: setlists and their contents, libraries, audio tracks and MIDI commands in the Metadata panel, accounts in the Services panel, and more. Typically, these items can be arranged by tapping “edit” and then dragging the three horizontal lines on the right-hand side of the cell up or down as needed. With Drag and Drop, there’s no need to enter “edit” mode first—simply tap and hold any part of the item until it lifts up and out of the list, then drag up or down.

Working With Items

Scores and bookmarks can be dragged out of forScore’s Score, Bookmark, and Setlist menus, the Search panel, and you can even drag the current item out of the main view’s title display (and remember: you can use any combination of these sources to add multiple items to your drag session). Drag any single item onto the page to open it, or drag one or more items into the Tab bar to open them in tabs.

Working With Setlists

No feature is better suited to Drag and Drop than Setlists. Creating, editing, and organizing your setlists is dramatically simpler and faster using these new gestures. To rearrange setlists or their contents, drag items up or down as discussed in the “rearranging items” section above. You can also drag a setlist into or out of a folder to move it.

To create a new setlist, drop one or more scores or bookmarks into the main Setlists list and supply a name. To add items to an existing setlist, drop them onto the setlist’s name and they’ll be added to the end of that list. Or, hover over a setlist (or tap it) to open it, then drop the items into the list at a specific point. You can even drag items out from one setlist and into another one to copy items between them.

Importing & Sharing Files

Drag and Drop isn’t just restricted to the same app; you can also drag compatible files into forScore to import them. Drop one or more PDF files into the Score menu to add them to your library, onto the page to import them and open the last one, or drop them into the tab bar to import and open all of them in new tabs. Drop them into the Setlist menu to create a new setlist with them or add them to an existing setlist using the same methods described in the previous section.

Importing works with other files, too. Drop any file type supported by forScore into certain views or panels to import them. Other supported formats include our own 4SC (scores), 4SS (setlists), and 4SB (backups) file types, as well as certain kinds of text and audio files.

You can also drag some items out of forScore to export them: drag a score to share a copy of its source PDF file, or drag an audio track, recording, or backup file to copy it to any other app that accepts them.

Audio Tracks

forScore uses Drag and Drop to help you work with audio files more quickly and flexibly, too. Drag them into and out of the audio file picker to import or export them, or drag them onto the media box to import them and link them to the current score or bookmark.

If the current track is a locally stored file, you can drag the track’s title out of the media box to send a copy to another app. Otherwise, if it’s a track that comes from your device’s shared Music library, you won’t be able to export the file but you can still use Drag and Drop to add the track to another score or bookmark in your library (drop it into the Metadata panel’s audio track list).

Annotating

While annotating, use Drag and Drop to rearrange your drawing presets by dragging them left or right. You can also work with images in several ways: drop an image onto the page (from the Photos app, Safari, or any app that allows you to drag images) and forScore will place it as an annotation. Resize it, reposition it, then tap outside of it to complete the process.

Create new stamps by dragging images from other apps directly into the Stamp Creator’s canvas. Use the Selection tool to select an area of drawn annotations, then use Drag and Drop to copy them as an image to other apps. Since you’re working with standard images in both cases, you can even combine these two examples to create new stamps from annotations you’ve previously drawn by hand, all without leaving the app or needing to go to your computer to deal with image editing software.

Services

In the Services panel, use Drag and Drop to move files between folders or drop certain things here to upload them. Drag scores, bookmarks, setlists, audio files, backups, or CSV files into the Services panel to upload them.

MIDI

Drag commands between the various MIDI sections in the Metadata panel and the Button editor to copy them, or drag commands onto the page to create a new button with them.

Multiple Windows

On iPadOS, Drag & Drop gestures can be used to create new windows. Drag a score or setlist to the left or right edge of the screen until it shows the forScore app icon, then let go to open a new window displaying that content.

Disabling Drag and Drop

Some users may find that iOS’ Drag and Drop gestures interfere with their ability to work. Although iOS does not currently provide a system setting to disable them, forScore offers an option in the Accessibility section of its Settings panel called “Drag and Drop” that significantly alters how it utilizes these gestures. When this setting is disabled, forScore does not make items available for dragging and most interactions return to how they worked with older versions of iOS.

Note that this setting does not affect how forScore receives drop gestures originating from other apps, however, so you can still do things like drag a PDF file from the Files app directly into forScore to import it.

Cue

Uncategorized

Our remote control system, Cue, allows you connect multiple devices together wirelessly to coordinate your page turns and program changes. It uses both Wi-Fi and Bluetooth to discover and communicate with nearby devices, and performance may vary based on environmental factors.

Note: Although Wi-Fi must be enabled for the app to discover nearby devices, an internet connection is not required when using Cue.

Roles

In order to properly coordinate your actions, Cue requires you to pick a role when initiating or joining a session. A “Leader” is responsible for turning pages and navigating between different scores or bookmarks in their library. A “Follower” lets their device follow along automatically, either by responding to page turns, program changes, or both.

Note: A Program Change is how we refer to navigation between songs. When a leader opens a new score or bookmark from their library or flips from the end of one piece to the beginning of the next, that’s a Program Change.

Tap the Cue icon in the tools menu to choose your role: “Lead,” “Follow Page Turns,” “Follow Program Changes,” “Follow Both,” or pick “Dual Page mode” (discussed later in this section). Tap this icon a second time to open the Cue connection panel which lists available and connected devices and lets you change your role or disconnect from the current session.

Device-Specific Considerations

Page turns work differently depending on your device’s orientation and settings. If a leader is using their device in landscape orientation, forScore will send page up and down messages but only other landscape-oriented devices will respond. Similarly, half-page turn messages can be sent by a leader who uses them, and only the connected devices who are using portrait mode and who have half-page turns enabled will see the effect.

Dual Page Mode

When using forScore on one device and the standalone Cue app on another, a special Dual Page mode lets you view two full pages side-by-side. One page appears on the primary device, and Cue displays the next page wirelessly. Tap or swipe on either screen to advance, two pages at a time. Links and buttons are also supported on either screen, so you don’t have to worry about which device you need to tap.

The standalone Cue app is currently available on the App Store worldwide.