February 27, 2019
Uncategorized
When you’re looking for something specific, the Search panel is the fastest way to find it. Unlike the search bar in many of forScore’s menus, which only allows you to narrow down the list of items displayed within that menu, the Search panel draws from many different sources.
Type in a phrase and you’ll see any scores, bookmarks, or setlists whose title contains that text, as well as any category names (composers, genres, tags, or labels), and actions (like “annotate,” “share,” or “settings”).
Tap a score or bookmark to open it, select a setlist to view it in the Setlist menu, and tap any metadata category to open it in the Score menu. If you choose the wrong thing, just reopen the search panel—the text you enter in is preserved if you return within a short amount of time.
Recent Items
When you open Search (before you’ve entered any text into the search bar) you’ll see the scores and bookmarks you’ve viewed most recently. By default, forScore shows the last five items you opened, but this can be customized in the Search section of forScore’s settings panel. Below that, you’ll see all of the scores and bookmarks in the current library. Once you start typing, recent items disappear and you’ll see only relevant search results instead.
Text Annotations and Notes
Not only can you find scores and bookmarks by their title or metadata, but you can also find individual pages whose text annotations or page notes contain the text you’ve entered in. Each result will show the score or bookmark’s name, the page number your text was found on, and a sample of the text with your highlighted result in context (so you can be sure you’ve got the right spot).
PDF Document Text
If the PDF document that you’re currently viewing is text-based instead of image-based, forScore can look for instances of your search query within the contents of the file itself. Like text annotations and page notes, results are shown with the title of the score, the page number, and your search text with surrounding text to provide some context.
Settings
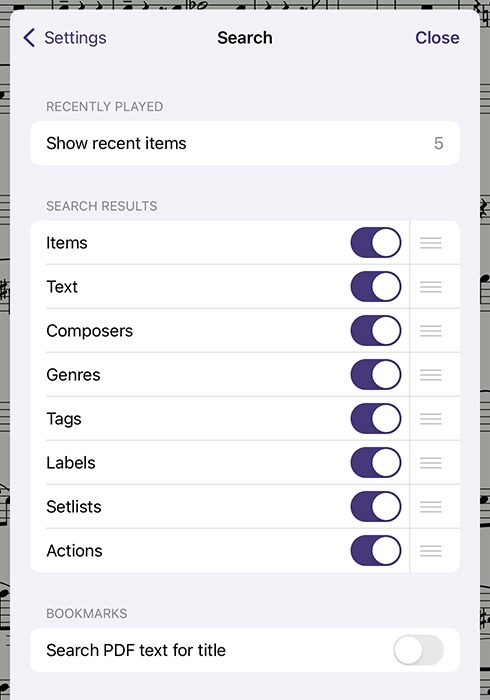
The Search submenu in forScore’s settings panel allows you to customize the search experience to better suit your needs. Specify how many (if any) recent items you want to see when you first open the search panel, enable or disable certain kinds of results and reorder them so that some of them appear higher in the list than others. You can also use this panel to enable or disable automatic PDF text searching in the Bookmarks menu.
February 27, 2019
Uncategorized
When you’re not viewing a page of music, the most common type of view you’ll be using in forScore is a menu, or a list of items. You’ll learn about specific menus later in this guide, but there are a few important concepts that apply equally to most of the app’s menus.
Layout
Menus usually feature a navigation bar along the top. This bar includes a title, a back button (when appropriate), a menu button which lets you change how items are sorted or presented, and an edit button. On iPhones or in other cases where space is limited, some of these buttons may appear in a toolbar along the bottom of the menu instead.
The menu (ellipsis) button lets you sort lists differently, show some lists as a grid of thumbnails, and may also offer a Filter function that allows you to only show items in the current list that match one or more rules that you define.
Below the navigation bar, you’ll usually see a segmented control that changes which content you see in the menu. This control may scroll horizontally if needed to display all of the options.
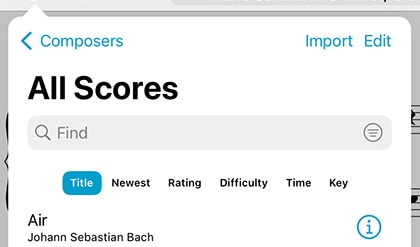
Most menus also include a search bar hidden between the navigation bar and the segmented control—drag the list downward to access it. When you’re done searching, or when you scroll, the search bar slides back under the navigation bar and disappears until you need it again.
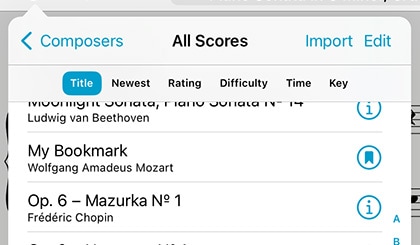
Menus may also include an index down the right-hand side which allows you to move quickly through longer lists. Tap or drag your finger up and down over it to jump to a particular spot or first letter (if the list is sorted alphabetically).
Working With Lists
To open an item, just tap on it. Some lists feature swipe actions so you can do common things quickly: swipe from right to left over an item to reveal actions such as Share or Delete. In many cases, you can also tap and hold an item (or right click) to see a complete list of actions available for that item.
You may also see a button or symbol off to the right-hand side of each item. A light gray arrow or chevron symbol indicates that selecting the row will display an additional list of items, such as selecting a composer to see all of their scores. A circular colored button lets you edit an item, while tapping anywhere else in that row opens the item instead.
One of the most important items in a menu is the edit button in the navigation bar or toolbar. While in edit mode, you can tap to check or uncheck multiple items in the list and then use the chevron button in the navigation bar to work with those files in a number of ways. These options can vary, but usually include the ability to select or de-select all items and delete or share them.
Sidebar
In some cases, forScore uses a sidebar to present many of its menus. It uses one of two styles: overlay or tile (tap the Sidebar button in the toolbar along the bottom of the menu to switch between these modes). Overlay dims the page and only allows you to access the menu—tap the dimmed area to dismiss it. In tiled mode, you can work with menus and the main view at the same time. Note that when the window is too small to use tiled mode, it switches back into overlay mode automatically. This sidebar layout is used on macOS, visionOS, and can be toggled using the Display Options overlay on supported iPads.
February 27, 2019
Uncategorized
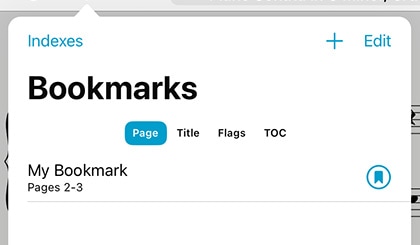
Bookmarks can either be simple references to a specific page, like a table of contents, or they can reference a span of pages that act like a virtual item in your library. We call these “page” or “item” bookmarks. Item bookmarks appear in the score menu like any other PDF file, start and stop on the pages you specify, and can even have their own metadata and audio tracks.
If you prefer, configure forScore to not show bookmarks outside of the Bookmarks menu by disabling the “show bookmarks in library” option in forScore’s settings panel.
No matter which kind of bookmarks you create, the Bookmarks menu always displays all of the bookmarks for the PDF file you’re currently viewing.
Creating Bookmarks
In the bookmarks menu (the open book icon), tap the + button to open the bookmark creator and choose which type of bookmark you’d like to create. Supply a title and page number(s) and, once any errors have been corrected, tap the Save button to finalize your bookmark. You can also tap the + button again to save the current bookmark and create another without returning to the menu first.
Table of Contents:
If your PDF file contains a table of contents, you can view it by selecting the menu’s “TOC” sort type. Tap on an item to go to that page, or tap “Import” to create bookmarks using this information as a starting point.
CSV/TSV Files:
If you have CSV or TSV (comma- or tab-separated values) files, you can use the Indexes feature to create your bookmarks. Add the file to forScore using any of the same methods you use to add PDFs, then open the Bookmarks menu and tap the table icon in the toolbar (if you don’t see it, make sure the Bookmarks list is showing). Tap the table icon in the toolbar and choose your file to begin.
This panel lists the values found in each row of your file, and you can tap on a value to specify how it should be used in forScore. Use the arrow buttons along the bottom to verify that the information in each row looks correct, skipping any header or footer rows and adjusting page numbers if needed. When you’re done, tap Save to create your bookmarks.
Editing & Deleting Bookmarks
To edit a bookmark, tap the arrow button next to it. If it’s a simple bookmark, you’ll see the same interface you used to create the bookmark and you can edit its title, start page, or add an end page to turn it into an Item bookmark. Tap the button next to an item bookmark and you’ll open the metadata panel which you’ll learn about in the Metadata section of this guide.
Delete a bookmark by swiping over it from right to left and choosing the Delete (trash can) action. You can also use the Edit button to select multiple bookmarks and delete them at once. Note that deleting a bookmark doesn’t affect the score it came from, but deleting a score deletes all of its bookmarks.
Flags
Flagging a page is a quick and easy way to mark it so you can remember to come back to it later. Switch to the Flags list and use the flag button to flag or un-flag the current page. Use the ellipsis button to switch between viewing flagged pages in the current score or across all scores in your library, and tap the trash can to delete all of the flags in the list at once.
February 27, 2019
Uncategorized
Modes
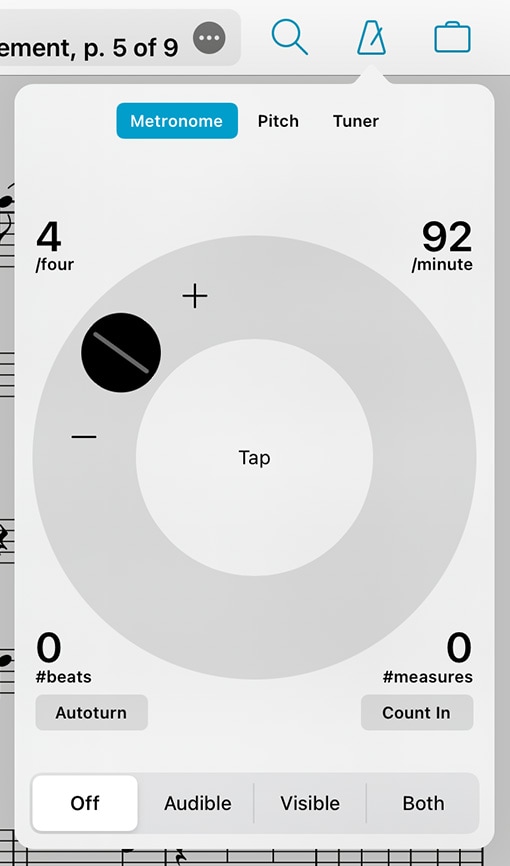
With forScore’s metronome, you can use several different methods to keep time. In Audible mode, you’ll hear a tick at regular intervals, based on the beats per minute (BPM) that you set. With the Visible metronome, a black border pulses around the edges of your score, allowing you to keep time visually while still being able to see the entire page. If you like, you can use the Both option to both see and hear the metronome simultaneously.
BPM and Time Signature
For each score in your library, forScore saves a unique BPM value and time signature that’s automatically used every time you return. Just tap either value to change it with the number keypad. You can also adjust the current score’s BPM by rotating the wheel, using the + and – buttons, or by tapping twice in the center of the screen.
Channels
If you’re using headphones or a line out, an icon at the top of the panel controls which channel(s) the audio plays through. Tap to toggle between left, right, and both channels.
Count In
Use the “Count In” feature to automatically turn off the metronome after a certain number of measures.
Autoturn
For scores with sequential pages, forScore’s metronome can also turn the pages for you automatically. To use autoturn, follow these three steps:
- For each page of your score, enter in the number of beats on that page or type in the number of measures and the app will do the math for you. If you’re on the first page of your score, consider adding a few extra beats as a lead-in.
- Tap the autoturn button to turn it on (if it isn’t already)
- Start the metronome by selecting Audible, Visible, or Both
Once the metronome counts up to the number you’ve specified, the page will turn automatically.
If you’re viewing your score in landscape mode, forScore will also scroll down when it reaches half of that number. (If you have 64 beats on a page, it’ll scroll to the bottom of the page at 32 beats.)
Turn the metronome off at any point to reset the autoturn count.
February 27, 2019
Uncategorized
If you allow it, forScore can track which scores, bookmarks, and setlists you view and for how long. With this information collected, the Dashboard feature in the tools menu can give you valuable insights into your playing habits and helps keep you on track. Three tabs along the top or bottom of the screen (shown on the left of the screen in a sidebar when space allows) give you different ways of viewing and using this information:
Analytics
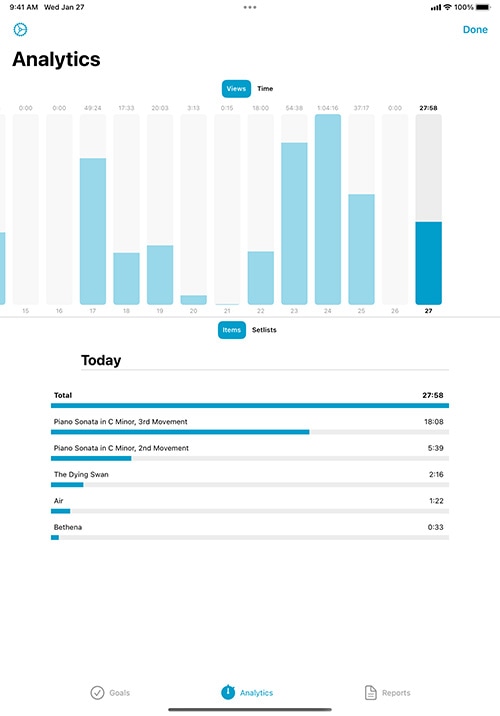
The Analytics tab shows information collected over the past ninety days. It can show you statistics for either items (scores and bookmarks) or setlists, and displays either the total amount of time you spent playing or the number of views.
Tap on any day to see a detailed list of items or setlists in the lower portion of the screen. This list shows everything you viewed on that particular day and is sorted from most played or viewed to least. You can tap on any item or setlist in this list to see how often you’ve viewed or played it over the past ninety days.
Goals
The Goals tab helps you reach a minimum number of views or amount of play time for each day, week, month, or all time. Goals can be item- or setlist-specific, or they can be more general.
The main list of goals shows your current progress as a circular view and, if your goal is time-specific, uses an additional view in the lower left-hand corner to show your results for the previous term. For instance, a weekly goal would prominently display this week’s progress with a smaller view for last week’s results.
Tap a goal to edit it or to view your results for the past ninety days. The timeline along the top of the screen shows your results for the past ninety days: tap on any of these graphics to share your progress with friends or colleagues via email, message, Twitter, Facebook, and more. It’s a great way to hold yourself accountable or to share your success.
Reports
The Reports tab lets you periodically share more detailed information with a colleague or instructor as a PDF document. To begin, create a new report template and tap the circled arrow button to edit it.
Here, you can customize your report to display progress for all items and/or setlists or for one in particular. Select day, week, or month, and choose how far back you’d like the report to go. Once you’re done, tap the back button and tap the report to view its results and use the action button in the top right-hand corner to share it.
Note: The information forScore collects is stored locally on your device. It doesn’t get sent to any servers, and won’t be shared with anyone unless you specifically choose to do so. Visit forscore.co/privacy to learn more.