Today Apple released iOS 12.2, so we wanted to mention that we’ve been testing with this latest update and forScore users should feel free to install it whenever they’re ready. In fact, there are two notable improvements made to this version that we wanted to call out.
First, this update fixes a system-wide issue when exporting PDFs that could cause semi-transparent annotations (like those made with default highlighter preset) to appear darker than normal, and could show artifacts especially around white markings.
This update also unexpectedly adds support for the Logitech Crayon to the latest generation of iPad Pros, the 11-inch and 12.9-inch (3rd generation). In our testing, we found them to be a great rugged alternative with few downsides. If you’ve got an iPad Pro and couldn’t justify the price of the Apple Pencil 2, this cheaper alternative definitely deserves a look.

Logitech’s Crayon doesn’t support pressure sensitivity, but it does support tilt and otherwise works similarly to the first generation Apple Pencil. The cap is built in so you can’t lose it, it charges with a cable so there’s no need to awkwardly plug it in to the bottom of your iPad, and it doesn’t require pairing so it’s even easier to set up. It’s a utilitarian tool that in many ways makes up for some of the more curious choices Apple made with their first Pencil, and overall it’s a great option that we’re happy to recommend.
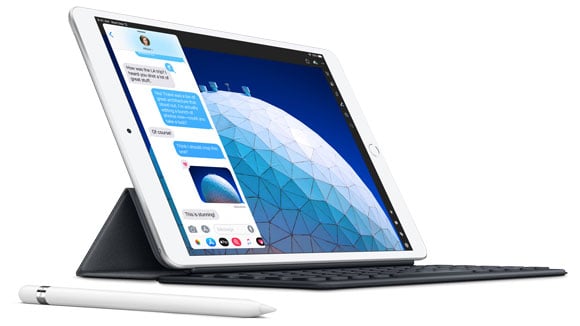
Today Apple introduced two new iPads and while their lineup has never been more complicated, there have also never been so many great options for customers to find one that best suits their needs. While we haven’t yet been able to test them, we expect that forScore will be fully compatible with the two newest models right out of the box. Their form factors and screen sizes aren’t new, and every major hardware feature (like Apple Pencil support) has been previously available in other devices, so there shouldn’t be any surprises.
There was a time when Apple’s product refreshes offered a new vision for their lineup: these older things are gone now, and they’re being replaced by better ones. Now, products slip downward from tier to tier as they age, with Apple continuing to offer them for lower prices or in select markets. It’s not as exciting, but in the end it’s a great thing for users. Whether you’re looking to get started with your first device or thinking of upgrading an older one, now’s a great time to check out Apple’s latest offerings.
If you’ve been interested in trying out forScore or seeing what the latest and greatest iPads have to offer, there’s never been a better time to head down to your local Apple retail store or third-party reseller. At many locations worldwide, including stores like Best Buy, forScore is currently featured on demo iPad Pros so you can see it in action and test it out for yourself. Where available, it’s also a great opportunity to try annotating with the new Apple Pencil 2 and using its double tap gesture.
We’re incredibly honored and thrilled to have been chosen to appear alongside many other amazing apps in this setting, and we think a lot of curious musicians will really benefit from the chance to experience it firsthand.

February 27, 2019
Uncategorized
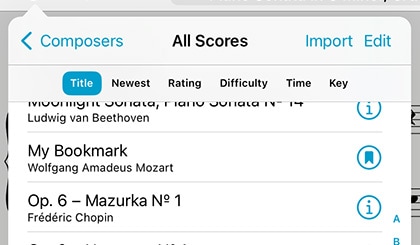
Bookmarks can either be simple references to a specific page, like a table of contents, or they can reference a span of pages that act like a virtual item in your library. We call these “page” or “item” bookmarks. Item bookmarks appear in the score menu like any other PDF file, start and stop on the pages you specify, and can even have their own metadata and audio tracks.
If you prefer, configure forScore to not show bookmarks outside of the Bookmarks menu by disabling the “show bookmarks in library” option in forScore’s settings panel.
No matter which kind of bookmarks you create, the Bookmarks menu always displays all of the bookmarks for the PDF file you’re currently viewing.
Creating Bookmarks
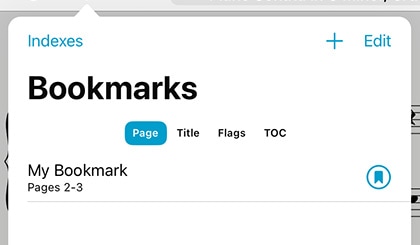
In the bookmarks menu (the open book icon), tap the + button to open the bookmark creator and choose which type of bookmark you’d like to create. Supply a title and page number(s) and, once any errors have been corrected, tap the Save button to finalize your bookmark. You can also tap the + button again to save the current bookmark and create another without returning to the menu first.
Table of Contents:
If your PDF file contains a table of contents, you can view it by selecting the menu’s “TOC” sort type. Tap on an item to go to that page, or tap “Import” to create bookmarks using this information as a starting point.
CSV/TSV Files:
If you have CSV or TSV (comma- or tab-separated values) files, you can use the Indexes feature to create your bookmarks. Add the file to forScore using any of the same methods you use to add PDFs, then open the Bookmarks menu and tap the table icon in the toolbar (if you don’t see it, make sure the Bookmarks list is showing). Tap the table icon in the toolbar and choose your file to begin.
This panel lists the values found in each row of your file, and you can tap on a value to specify how it should be used in forScore. Use the arrow buttons along the bottom to verify that the information in each row looks correct, skipping any header or footer rows and adjusting page numbers if needed. When you’re done, tap Save to create your bookmarks.
Editing & Deleting Bookmarks
To edit a bookmark, tap the arrow button next to it. If it’s a simple bookmark, you’ll see the same interface you used to create the bookmark and you can edit its title, start page, or add an end page to turn it into an Item bookmark. Tap the button next to an item bookmark and you’ll open the metadata panel which you’ll learn about in the Metadata section of this guide.
Delete a bookmark by swiping over it from right to left and choosing the Delete (trash can) action. You can also use the Edit button to select multiple bookmarks and delete them at once. Note that deleting a bookmark doesn’t affect the score it came from, but deleting a score deletes all of its bookmarks.
Flags
Flagging a page is a quick and easy way to mark it so you can remember to come back to it later. Switch to the Flags list and use the flag button to flag or un-flag the current page. Use the ellipsis button to switch between viewing flagged pages in the current score or across all scores in your library, and tap the trash can to delete all of the flags in the list at once.
February 27, 2019
Uncategorized
Modes
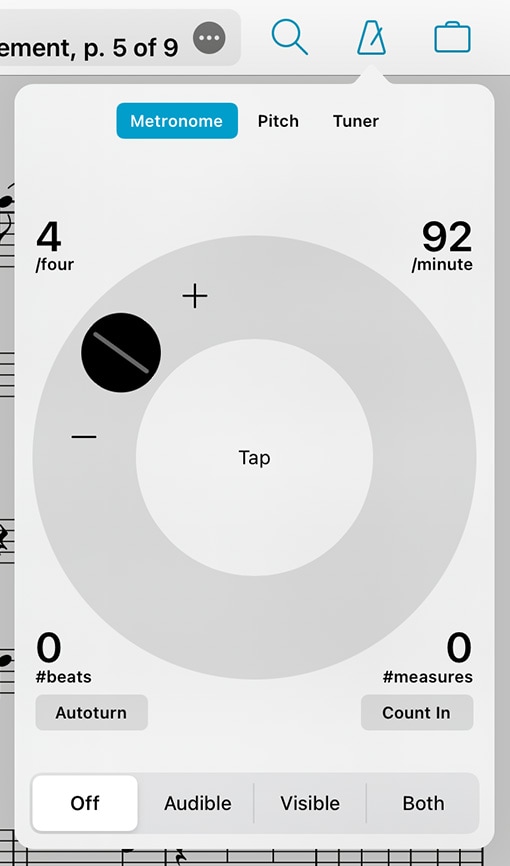
With forScore’s metronome, you can use several different methods to keep time. In Audible mode, you’ll hear a tick at regular intervals, based on the beats per minute (BPM) that you set. With the Visible metronome, a black border pulses around the edges of your score, allowing you to keep time visually while still being able to see the entire page. If you like, you can use the Both option to both see and hear the metronome simultaneously.
BPM and Time Signature
For each score in your library, forScore saves a unique BPM value and time signature that’s automatically used every time you return. Just tap either value to change it with the number keypad. You can also adjust the current score’s BPM by rotating the wheel, using the + and – buttons, or by tapping twice in the center of the screen.
Channels
If you’re using headphones or a line out, an icon at the top of the panel controls which channel(s) the audio plays through. Tap to toggle between left, right, and both channels.
Count In
Use the “Count In” feature to automatically turn off the metronome after a certain number of measures.
Autoturn
For scores with sequential pages, forScore’s metronome can also turn the pages for you automatically. To use autoturn, follow these three steps:
- For each page of your score, enter in the number of beats on that page or type in the number of measures and the app will do the math for you. If you’re on the first page of your score, consider adding a few extra beats as a lead-in.
- Tap the autoturn button to turn it on (if it isn’t already)
- Start the metronome by selecting Audible, Visible, or Both
Once the metronome counts up to the number you’ve specified, the page will turn automatically.
If you’re viewing your score in landscape mode, forScore will also scroll down when it reaches half of that number. (If you have 64 beats on a page, it’ll scroll to the bottom of the page at 32 beats.)
Turn the metronome off at any point to reset the autoturn count.